


Jag_lars
-
Posts
182 -
Joined
-
Last visited
Content Type
Profiles
Forums
Gallery
Blogs
Posts posted by Jag_lars
-
-
The diagram in the owners manual and WSM looks norhing like the actual panel layout in ny car (early diablo).
I have read a about this before, and some years ago I got a picture of the right layout wirh numbers and functions on it. I have now lost that image...
I am looking for the fuse that powers re hazard and clock, as borh have stopped working on my 92.
Does anybody have rhe right early fuse panel diagram?
-
But I'll see your chrome wheels and tinted windows and raise you one of these babies. You're move, Europe.


Just wait until Japan Enters...
-
By golly you're right. There's no slight contouring to the face of the wheel centers and there are only four bolts per spoke vice five. I've never seen replica wheels like that, not even on replicas. Who would go to all that trouble? And why is all this weird shit always in Europe?
Yes, defiantly not US, easy identified by the lack of tacky chrome wheels and tinted windows.

Also, pretty sure Johannesburg is just a little south of Europe…

-
bumper and mirrors are 93 and up(vt).
-
Early to rise.

Love the early Diablo.Perfect!
-
Great write up SingleSeat! Thank you for some real tech input!
-
did you have the door open when you checked the trunk? Start the car, turn on the driving lights, close the door. Interior lights should be out and trunk light as well.
Good point. Doors where open, but so long that the interior light went off.
Trunk light following the exterior light does not make sense to me, as you can not open to trunk lid on a Diablo with the pop-up lights up....
-
I am a little puzzled. Mine follows the intrument lights (same as headlights/drivibg lights)
So driving around at night the trunk light is actually on.
-
Is the power feed the two wires in the bundle going by MC?
-
turns on when the interior lights are on regardless of lid open or closed (There's no switch on the lid). Shows you how Lamborghini keeps costs/weight down. On a Mercedes there would not only be a switch, but a warning indicator on the dash when the bulb has burned out.
Thanks, I suspected that to be the case.
-
How does your trunk light work?
Manual on/off, directly on the light?
Turns on with the interior light?
Turns on as the trunk lid is opended closed?
-
How long did this procedure take, roughly?
Car in - car out, a few hours, taking your time and a cup of coffee
-
I installed the Murci Roadster exhust section on my Diablo.
To make a perfect fit I did bring the muffler end pipes about 1cm closer to each other to align better with my exhaust system.
I have an sports exhaust, and it might very well be that the pipes are just abit closer than the stock box, making this modification nesssesary for a perfect fit in my case only.
Stock Diablo tipes are indepandenat on muffler outlet spacing
I also removed about a 1 - 1.5cm section right before the gasket lip, to bring the entire exhaust closer to the bumper.
Shaved 3mm or so from the seal lip on the murci pipes, to make Diablo clamps fit.
Stock donut gasket fits fine.
-
Here are some pics from the complete tool kit from my `94 VT.
More Quality pics can be seen on my private (non-Commercial) Homepage.
www.lamborghini-diablo.de
Thanks for sharing. Looks like the complete kit.
-
It's cool the subtle differences offered even back then. Didn't know there was white/red and black piping. Mine is white piping. I wonder if this one will be shown on tv.
Yes very cool. Tan piping was also an option.
The 1993 price/option list state "seat piping" as a 250 pund option.
-
Bad picture, but you get the idea. I have two of everything, except the inflator and tow bar
Thanks for posting.
Looks like the USAG kit is correct for early cars, and it look alot nicer than the repro kit.
This is from a recent add, and show the same kit.

-
Can anybody share a pictures and some details on their original Diablo Tool kit? Early 2wd or VT.
Looking at the repros avalible from Lamborghini , they do look a little cheap, and missing the leather wrap?
-
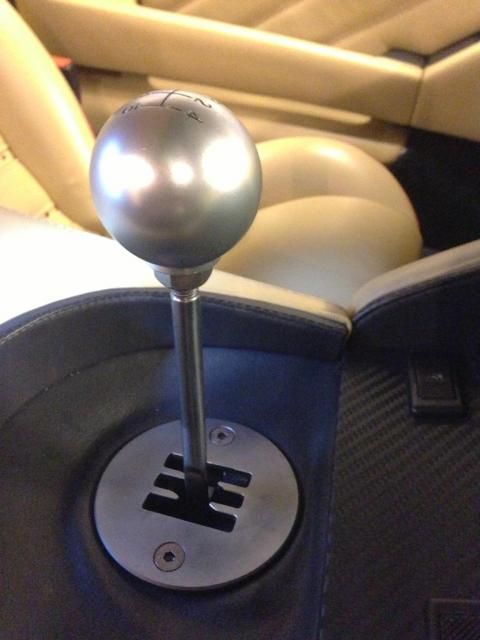
I am not sure I see the point in the titanium shifter? If you like a shorter throw, replacing the long stock knob with ball type is great. I did that, and like the feel.
If your stick snaps, you either need to look at your transmission or driving skillls, imo.
I used 2 stands in the front of the car, and that is OK for acess.
With the car in neutral the stick should feel rather stiff. If you select a gear (engine off), and you are able to move the stick forward and backwards, and up and down, check your spring.
The car is fully drivable with a broken spring, but the tight feel is lost.
-
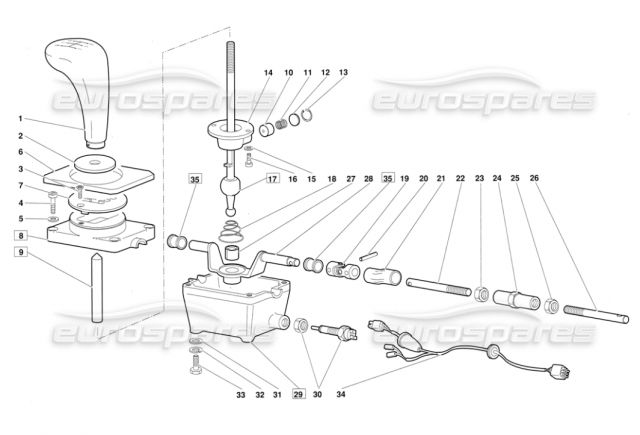
My Diablo suddenly lost its riffle like precise gear shifter feel on a recent drive. The car shifts fine, but the tight and nice feel is lost and the stick would rattle against the shifter gates at certain rpms.
You can feel the problem with the car just sitting in neutral. If your gear stick can be moved, even just very little, around the neutral feel, without it not returning back to center (neutral) position on its own, then you might have a broken spring in the shifter control tower (or worn bushings)
I remember 2 others Diablos I have tried, with the same problem, and I would expect that some owners drive around, not knowing any better, with a sloppy shifter feel.
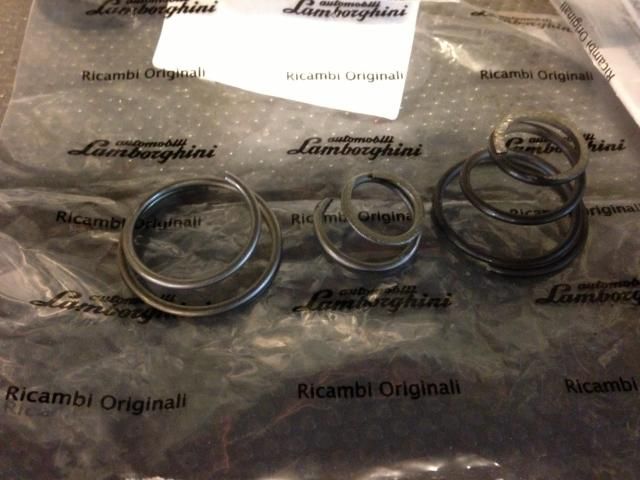
This applies to all 2wd, SE30, VT, SV Roadster GT and 6.0. Note that 6.0 use a different spring, which might be updated (?)
Part No. 002429160 - all diablos except 6.0
Part No. 0024005155 – 6.0
Depending on mileage and consider to replace these parts as well.
Dust pad Part No. 002431969
Bushing axial 2 x Part No. 002433020
Shifter bushing Part No. 002427207 (not used on very early 2wd cars)
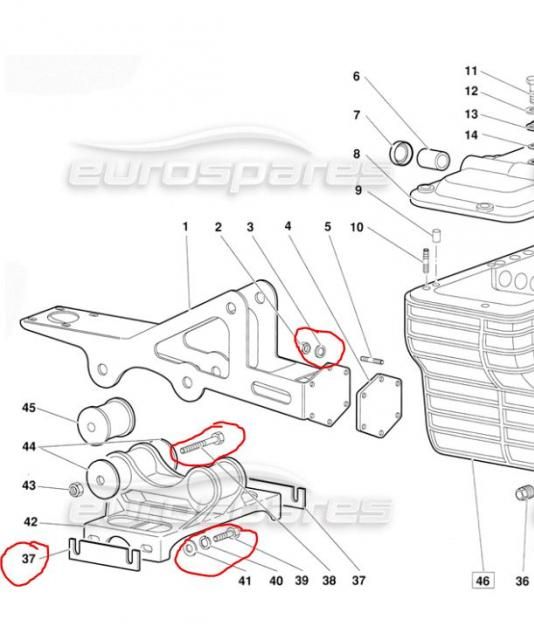
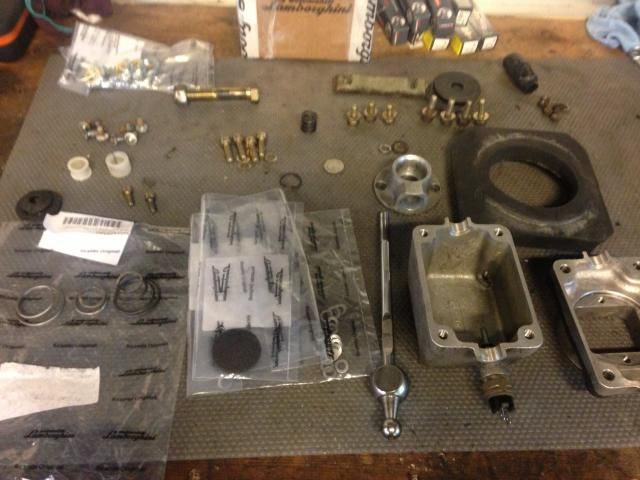
The procedure to remove the tower is as follows:
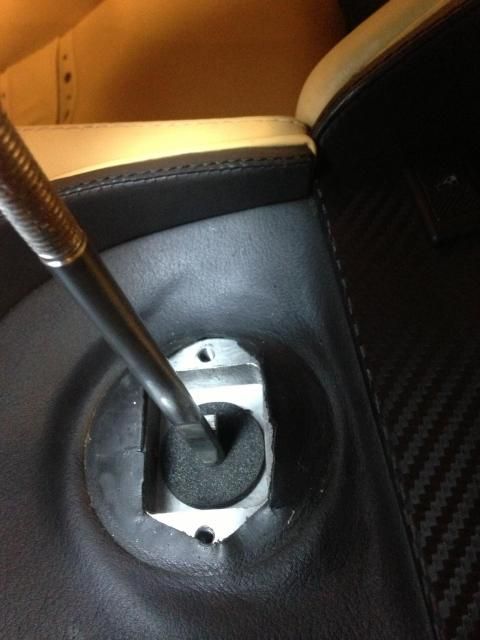
- Remove the shifter knob and gate from inside the car.
-Remove front longitudinal undercarriage cover plate
- With a marker make a reference for the tower alignment on the brace. I used the hole in the brace to draw circle. Not strictly necessary, but nice for alignment reference when doing the reassembly.
- Remove the lower bracing bolts that support the control tower. 4 x 13mm bolts (wrench width).
Remember to note how the spacers plates between the brace and chassis are arrange on your car.
-Remove the upper 22mm support bolt nut, and pull the bolt out. 2 spacers for the mount will come out as well.
- Remove the 6 x 10mm nuts the holds the brace to the transmission front.
-Unplug the reverse light trigger cable
- Remove the 4 x 13mm bolts the holds the shifter console to the brace.
- Move the brace forward and down.
- With the shifter console hanging down from the car, remove the foam block on top, (held on with tape or adhesive), remove the 4 x umbraco bolts on top, to split the case and remove from car.
(Alternatively you can disconnect the linkage to the tower, and split the case on your work bench, but this requires readjusting the linkage after assembly.)
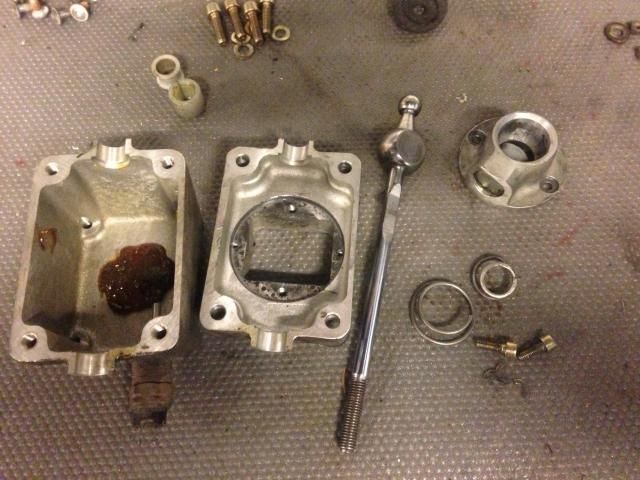
-With the case split remove the 2 bolts the holds the inside cover to the top console cover.
- Pry of the bushing on the end of the gear stick- and remove the (broken) spring.
-Clean all parts and reassembly with all parts greased up.
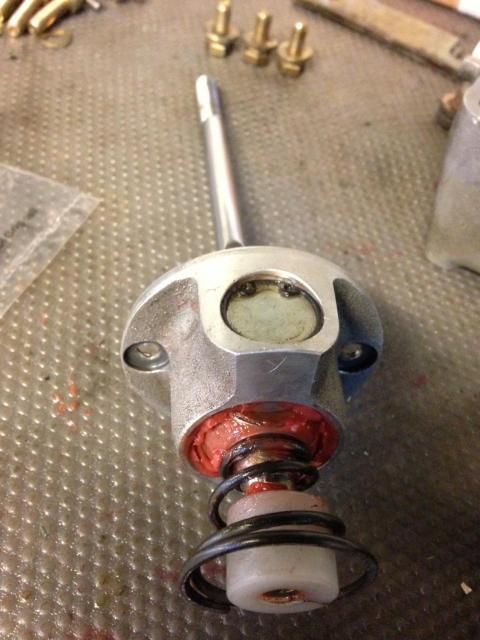
- Also remove the plug and spring in the inside cover, by removing the snap ring. Re grease and reassemble.
I use Redline CV 2 grease for this job.
Reassemble in reverse order, and enjoy your restored tight gear feel.
I assume no liability for the above instruction. This is only a guide.


-
Not the most effective way to shift a Diablo, should not be nessesary to rev match.
I know for a fact that a Diablo will out accelerate a R8, with no problems.
-
The Allen head screws that hold the housing together can be pretty snug. I believe I stripped one of the heads when I tried to get mine out and finally had to drill it. So maybe a little PB blaster or something similar before hand if you have time.
Will do!
-
I can't remember for sure but the trans brace (entire brace off the transmission) will be the easiest. There are 10mm nuts that hold the brace to the trans. 4 13mm bolts that hold the brace to the tunnel. And 4 13mm bolts that hold the shifter housing to the brace. Be sure to remember how many shims are on the brace to tunnel area so you can put them back the same way and keep the shifter alignment right. Depending what you need to do with the shifter, I think the housing is held together by Allen head screws. I had to replace the shift rod once...
Hope that helps.
One more edit....there is a large 22mm bolt and nut that you need to remove that connects the brace to the end of the trans.
Thanks, thats great.
I need ti have a look at the 3 bushings in the shifter box. The shifter have become more" loose"in the gates than the normalt tight feel of the shifter.
-
What is the approach to remove the shifter box on a Diablo?
Looks like the bracket that bolts to the transmission need to come down as well?
-
What is the approach to remove the shifter box on a Diablo?
Looks like the bracket that bolts to the transmission need to come down as well?


Fuse panel diagram
in Archived Content
Posted
The diagram above is also what I have in my Manuals, but not the same as in the cars footwell. Cars is RHD, they might use a different setup? Anybody RHD owners that can check?
I clearly remeber seeing a picture with naming of this type og layout, when I find it again I shall save it in a vault